“(SKU:RB-02S042)夏普GP2Y0A02YK0F 红外测距传感器”的版本间的差异
来自ALSROBOT WiKi
(→产品相关推荐) |
|||
| (未显示1个用户的2个中间版本) | |||
| 第8行: | 第8行: | ||
# 功耗: 标称值33 mA | # 功耗: 标称值33 mA | ||
# 供电电压:4.5 to 5.5 V | # 供电电压:4.5 to 5.5 V | ||
| − | |||
[[文件:RB-02S042109.png|737px|缩略图|居中]] | [[文件:RB-02S042109.png|737px|缩略图|居中]] | ||
[[文件:RB-02S042110.png|616px|缩略图|居中]] | [[文件:RB-02S042110.png|616px|缩略图|居中]] | ||
| − | == | + | ==接口定义== |
[[文件:RB-02S0421.jpg|500px|缩略图|居中]] | [[文件:RB-02S0421.jpg|500px|缩略图|居中]] | ||
| − | == | + | ==使用方法== |
| + | ===接线方法=== | ||
| + | 将夏普GP2Y0A02YK0F 红外测距传感器连接到UNO控制器的A1接口 | ||
| + | ===例子程序1=== | ||
<pre style="color:blue"> | <pre style="color:blue"> | ||
/* description: | /* description: | ||
| 第34行: | 第36行: | ||
</pre> | </pre> | ||
| − | == | + | ===例子程序2=== |
<pre style="color:blue"> | <pre style="color:blue"> | ||
/******** start code ********/ | /******** start code ********/ | ||
| 第72行: | 第74行: | ||
/******** end code ********/ | /******** end code ********/ | ||
</pre> | </pre> | ||
| − | + | ===程序效果=== | |
| − | + | 打开Arduino IDE软件的串口监视器,将波特率设置为9600,能显示出当前传感器测试到的障碍物距离。测量时注意障碍物需要在传感器测量的有效范围内。 | |
| − | + | ||
| − | + | ||
==产品相关推荐== | ==产品相关推荐== | ||
[[文件:erweima.png|230px|无框|右]] | [[文件:erweima.png|230px|无框|右]] | ||
2015年10月23日 (五) 16:17的最后版本
目录 |
产品概述
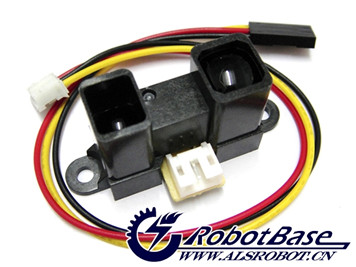
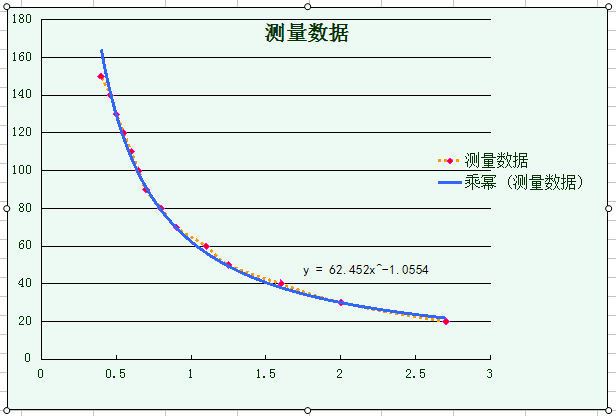
GP2Y0A02YK0F是夏普的一款距离测量传感器模块。它由PSD(position sensitive detector) 和IRED (infrared emitting diode) 以及信号处理电路三部分组成。由于采用了三角测量方法,被测物体的材质、环境温度以及测量时间都不会影响传感器的测量精度。传感器输出电压值对应探测的距离。通过测量电压值就可以得出所探测物体的距离,所以这款传感器可以用于距离测量、避障等场合。
规格参数
- 距离测量范围:20 to 150 cm
- 信号输出类型:电压模拟信号
- 包装尺寸:29.5×13×21.6 mm
- 功耗: 标称值33 mA
- 供电电压:4.5 to 5.5 V
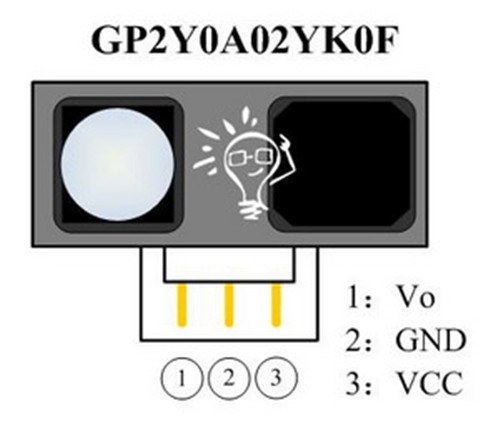
接口定义
使用方法
接线方法
将夏普GP2Y0A02YK0F 红外测距传感器连接到UNO控制器的A1接口
例子程序1
/*  description:
    The sample code is used to measure distance by GP2Y0A02YK IR ranger sensor.
    VCC -- VCC
    GND -- GND
    Signal -- Analog 1
    */
int IRpin = 1;                                    // analog pin for reading the IR sensor
void setup() {
	Serial.begin(9600);                             // start the serial port
}
void loop() {
	float volts = analogRead(IRpin)*0.0048828125;   // value from sensor * (5/1024) - if running 3.3.volts then change 5 to 3.3
	float distance = 65*pow(volts, -1.10);          // worked out from graph 65 = theretical distance / (1/Volts)
	Serial.println(distance);                       // print the distance
	delay(100);                                     // arbitary wait time.
}
例子程序2
/******** start code ********/
/*
 *	created		2013-07-26
 *	by		lisper (leyapin@gmail.com)
 *	function	test gp2y0a02yk, read value from A1
 *
 */

//connect gp2y0a02 to A1
#define pin A1

void setup () {
        Serial.begin (9600);
        pinMode (pin, INPUT);
}

void loop () {
        uint16_t value = analogRead (pin);
        uint16_t range = get_gp2y0a02 (value);
        Serial.println (value);
        Serial.print (range);
        Serial.println (" cm");
        Serial.println ();
        delay (500);
}

//return distance (cm)
uint16_t get_gp2y0a02 (uint16_t value) {
        if (value < 70)  value = 70;
        return 12777.3/value-1.1;        //(cm)
        //return (62.5/(value/1023.0*5)-1.1);        //(cm)
        //return ((67870.0 / (value - 3.0)) - 40.0); //gp2d12 (mm)
}

/******** end code ********/
程序效果
打开Arduino IDE软件的串口监视器,将波特率设置为9600,能显示出当前传感器测试到的障碍物距离。测量时注意障碍物需要在传感器测量的有效范围内。


